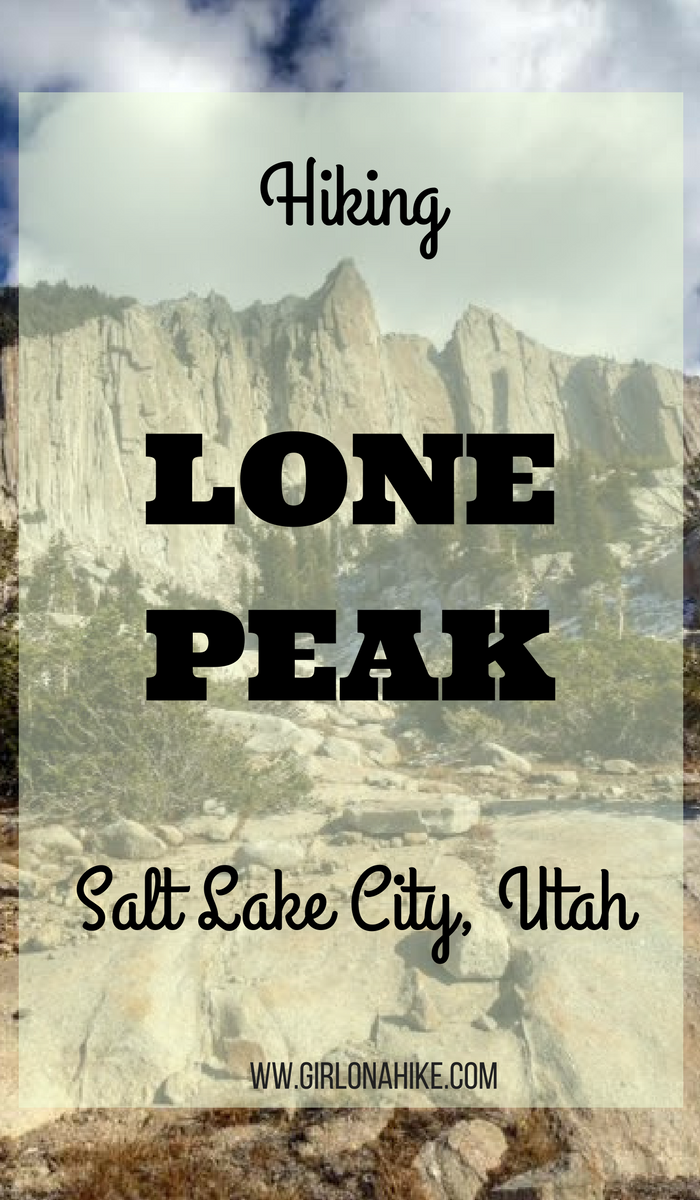

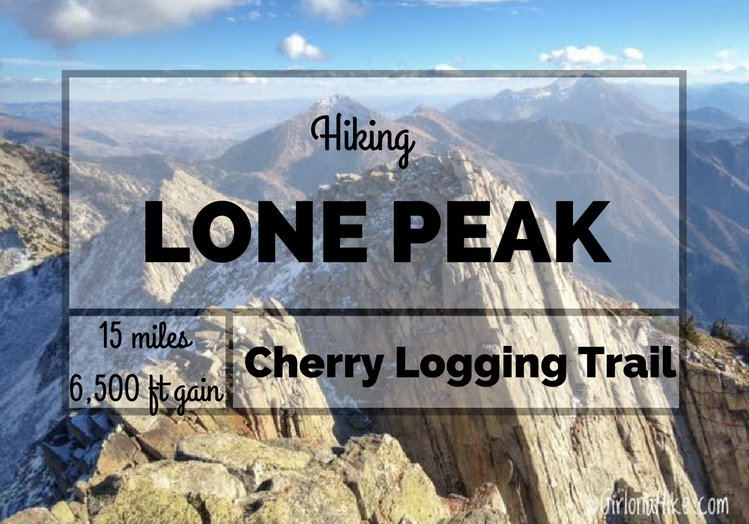
Hiking Lone Peak (11,251 ft) – One of the Most Iconic Summits Along the Wasatch Front
Lone Peak (elevation 11,251 feet) is one of the tallest and most dramatic summits along the Wasatch Front, towering above Draper, Utah. Its distinct granite summit is easily visible from both Salt Lake and Utah Counties, making it a prominent landmark and a bucket-list summit for local hikers and peak baggers alike.
On a clear day, Lone Peak can be seen from over 100 miles away, and climbing it is often considered a rite of passage for serious hikers in Utah. While Lone Peak is not one of Utah’s 8 Ultra Prominent Peaks, it ranks 98th on the list of Utah peaks with at least 500 feet of prominence and is included in the sought-after Wasatch 11ers list (peaks over 11,000 ft in the Wasatch Range).
⚠️ This is an intense and demanding hike that requires excellent fitness, route-finding skills, and preparation for rapidly changing weather conditions. Most hikers will take all day to complete the climb, but the reward is well worth it—Lone Peak offers one of the best 360-degree summit views in all of Utah.
Best Routes to Hike Lone Peak
There are five main routes to reach the summit of Lone Peak. Each varies in length, difficulty, and scenery. Below is a breakdown of each option:
1. Cherry Canyon Logging Trail (Recommended Route)
Trailhead: Orson Smith Park, Draper, UT
Highlights: Year-round spring, scenic views, access to Outlaw Cabin
Pros: Shaded sections, consistent elevation gain
Cons: Long and strenuous
This is the route featured in the description below. It’s a beautiful, steady climb with plenty of variety and shade early on. You’ll pass the Cherry Canyon Spring and the historic Outlaw Cabin before beginning the exposed push toward the summit.
2. Jacob’s Ladder Trail (Shortest Route)
Trailhead: Requires 4×4 vehicle via rough dirt road
Highlights: Shortest and steepest ascent
Pros: Starts at higher elevation
Cons: Winter gate closure from first snowfall until July 1st
Jacob’s Ladder is the most popular route thanks to its direct approach. Be ready for a relentless climb and minimal shade. Read my trail guide on this route here.
3. Trail of the Eagle (Least Scenic)
Trailhead: Little Willow Drainage
Highlights: Newest route
Pros: Less crowded
Cons: Less scenic and less defined trail
This trail offers a more secluded experience but lacks the scenic beauty of the other routes.
4. Schoolhouse Springs Trail
Trailhead: Alpine, UT
Highlights: Southern exposure
Pros: Quiet approach
Cons: Gets very hot in summer; limited shade
This route is not recommended for summer hikes due to extreme sun exposure on the south-facing slope.
5. Bell’s Canyon Trail (Most Scenic, Longest)
Trailhead: Bell Canyon Trailhead in Sandy, UT
Highlights: Bell’s Canyon Waterfall, upper reservoir
Pros: Spectacular scenery, alpine lakes
Cons: Longest and most difficult route
This is the most scenic route to Lone Peak and ideal for experienced hikers looking for a true challenge. After the reservoir, expect route-finding to reach the summit.
Quick Tips for Hiking Lone Peak
-
Start early—pre-dawn if possible—to avoid storms and extreme heat.
-
Bring plenty of water, high-calorie snacks, and layers.
-
Carry GPS, maps, or a navigation app like Gaia GPS.
-
Check the weather forecast before heading out—this peak is exposed and dangerous in storms.
-
This hike is not recommended for dogs due to the rugged terrain, steep granite slabs, and exposure near the summit.
Lone Peak FAQ: Everything You Need to Know Before Hiking
🗓️ When Is the Best Time to Hike Lone Peak?
The ideal time to hike Lone Peak is from late July through October. Some years may allow for later hiking—in 2016, for example, we safely summited on November 7th due to unusually warm and dry weather. If you’re hiking during summer months, plan for a very early start to avoid extreme heat and afternoon thunderstorms.
🐕 Can I Bring My Dog?
No, dogs are not allowed in the Lone Peak Wilderness due to watershed protection laws. Please respect these rules to preserve access for all hikers.
👶 Is Lone Peak a Good Hike for Kids?
Definitely not. This is a strenuous and technical hike that requires endurance, route-finding, and some scrambling near the summit. It’s not suitable for children.
💧 How Much Water Should I Carry?
Bring a minimum of 3 liters of water, and more if hiking on a hot day. If you’re hiking via the Cherry Canyon Logging Trail, you can refill and filter water at the year-round spring located about halfway up the trail.
⏱️ How Long Does the Hike Take?
It depends on your route and fitness level. Here’s a rough breakdown:
-
Cherry Canyon Logging Trail
-
~3 to 3.5 hours to reach Outlaw Cabin
-
~6 hours to reach the summit
-
Total round-trip time: ~10 hours
-
Factors like fitness level, pack weight, weather, and rest breaks will all impact your total hike time.
-
😨 I’m Afraid of Heights—Can I Still Summit?
The only section that may be intimidating is the last 100 yards to the summit, which involves exposed granite slabs and mild scrambling. Even experienced hikers can find this part mentally challenging. If you’re afraid of heights, it’s possible to stop just short of the summit and still enjoy incredible views. I personally needed help and encouragement from my partner to push through that final stretch.
Directions
To get to the Cherry Canyon Logging Trail, you first need to get to the Orson Smith TH in Draper, UT. From SLC, head south on I-15 and take exit 291. Head East on 123rd South for 1.4 miles. Turn Right on 900 South, then Left on Pioneer Road. Continue straight around the Round-a-Bout. Turn Right on 2000 East. In 0.2 miles you will see the Orson Smith Park/TH on your Left. This is where you will park. There are restrooms available. The Cherry Logging Trail starts to the left (North) and behind the restrooms up a set of stairs. Here is a driving map.
Trail Info
Distance: 15 miles RT
Elevation gain: 6,500 ft
Time: 8-12 hours
Dog friendly? No, dogs are not allowed
Kid friendly? No
Fees/Permits? None
Hitting the Trailhead

Locate the trailhead (TH) just left of the restrooms and behind the information sign at Orson Smith Park. We started hiking at 8:15 AM, forgetting the time change—starting earlier would’ve been ideal to catch the sunrise.
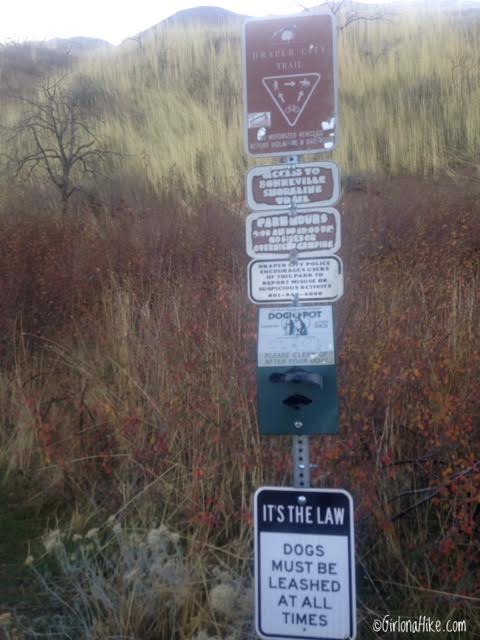
You’ll pass a sign allowing dogs on leash, which applies only to the Bonneville Shoreline Trail (BST) section. Dogs are not allowed once you’re on the official Cherry Canyon Logging Trail.
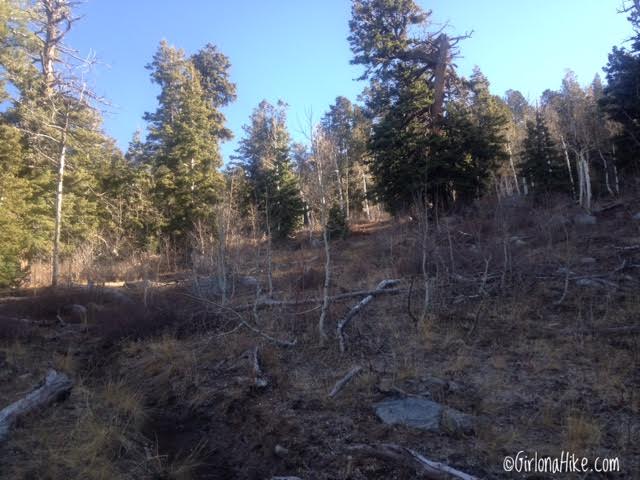
Climbing to the Cherry Logging Trail
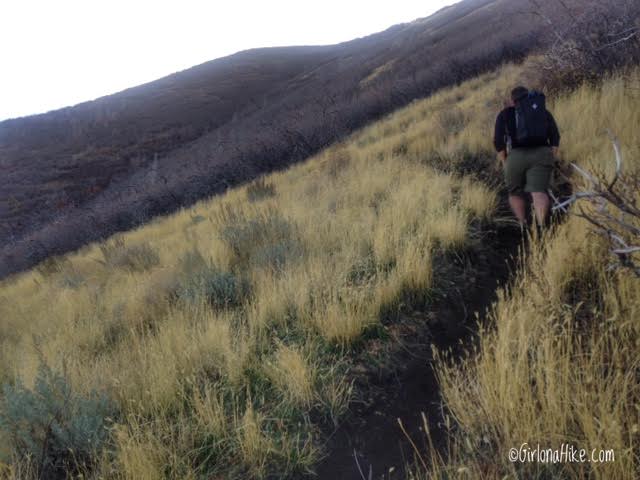
Begin with 4–5 relatively easy switchbacks.
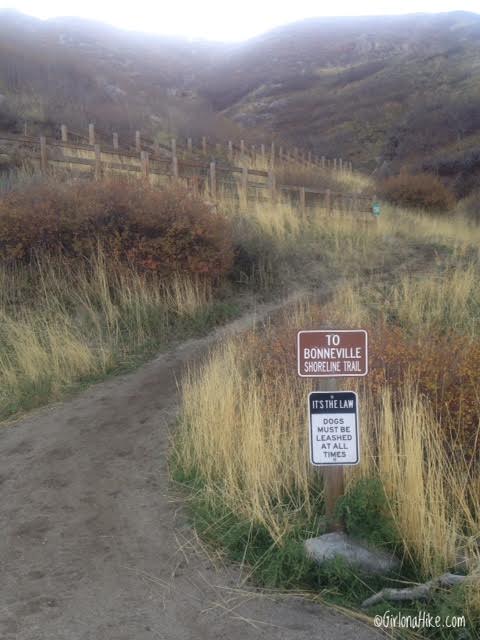
Once you reach the wide Aqueduct Trail, turn left and follow signs to the BST. You’ll encounter more switchbacks here.
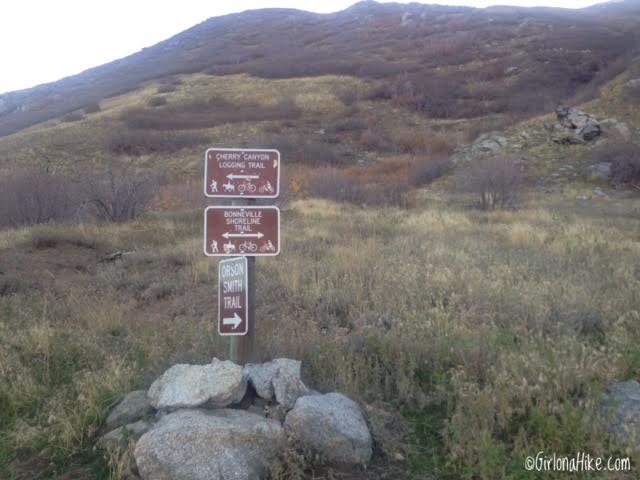
At the next “T” you have reached the BST. Turn Left, following the sign for the Cherry Logging Trail, which is only about 75 yards away.
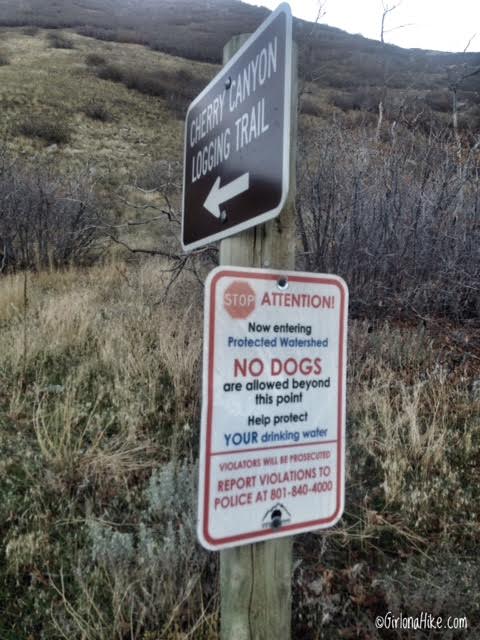
At the next T-junction, follow the sign for the Cherry Logging Trail, just 75 yards away. This is the critical trail split—you can’t miss the “No Dogs” sign. Turn right (east), and the true adventure begins!
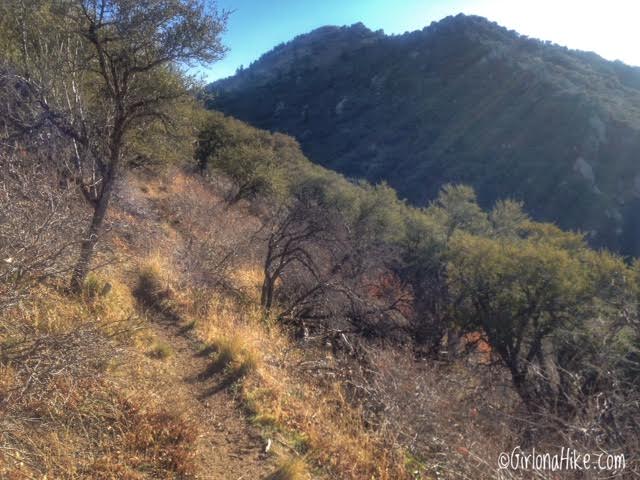
Climbing Through Cherry Canyon
Work your way up 6–7 steep switchbacks. The trail flattens briefly, crosses Cherry Canyon, and then climbs again.
TIP: Using hiking poles will help significantly and help protect your knees and hips and help you on the uphill.
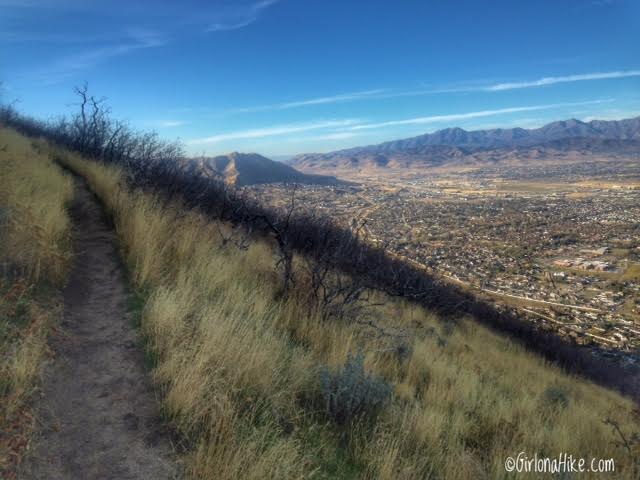
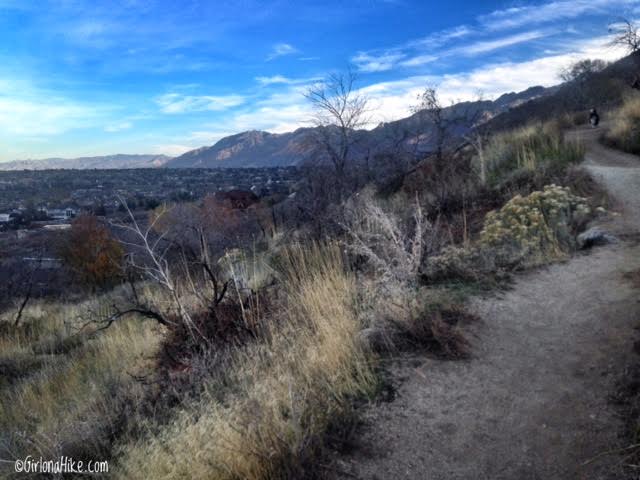
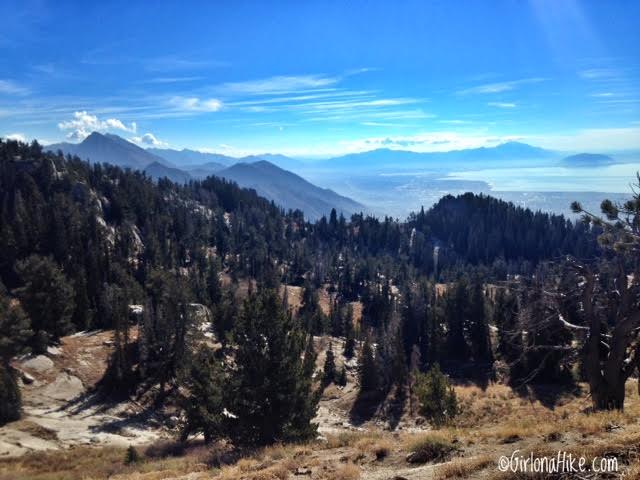
As the sun rises over Draper, enjoy sweeping views across the valley to Flat Top Mountain in the Oquirrh Range.
Just when you think the switchbacks are done—there are about 50 more!
Just when you can’t take anymore switchbacks….there are about another 50 ahead of you.
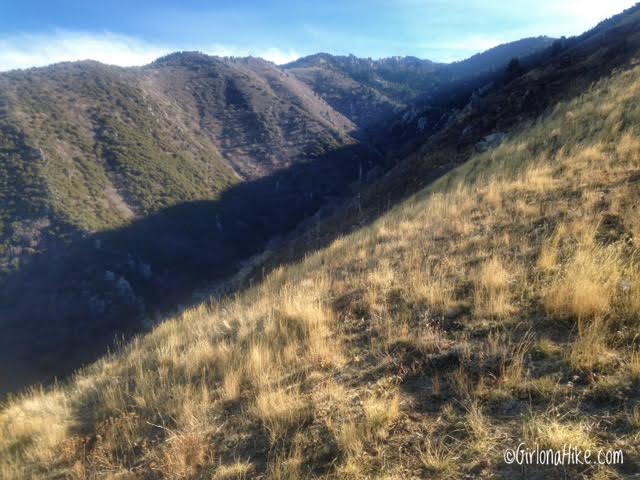
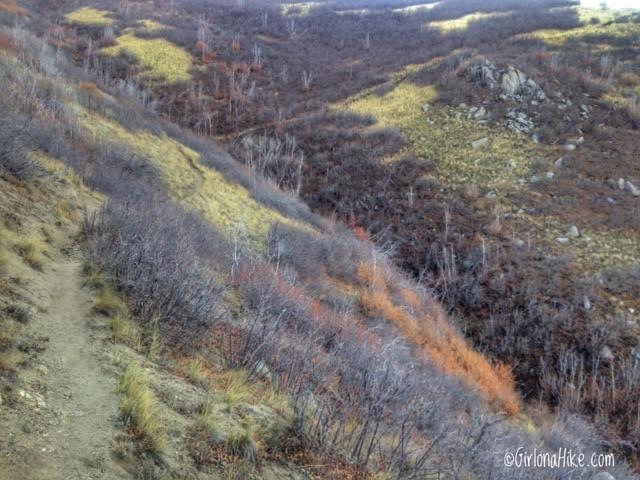
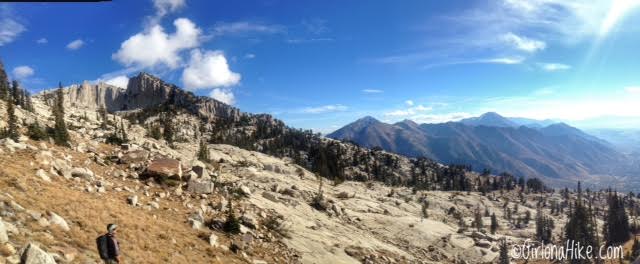
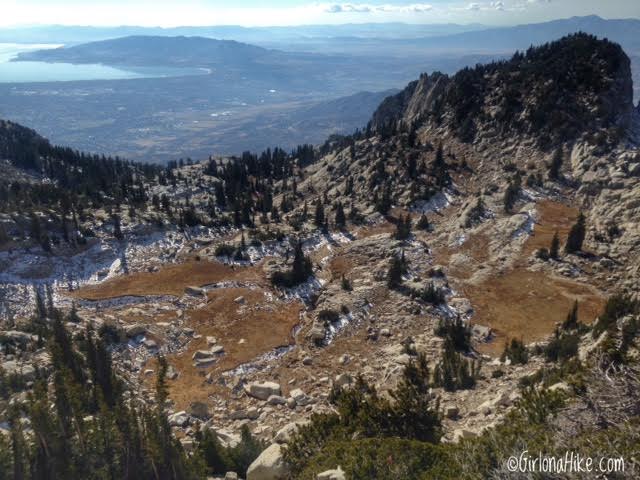
We reached this nice view point of Bear Canyon in about 1.5 hours. That ridge across the way is the Trail of the Eagle route.
Scenic Views & First Major Landmark
After about 1.5 hours, you’ll reach a great viewpoint of Bear Canyon. Across the ridge is the Trail of the Eagle route.
The trail wraps around the hillside and offers a brief relief from steep hiking. For about half a mile, you’ll follow a relatively flat section that leads to a small saddle before climbing again.
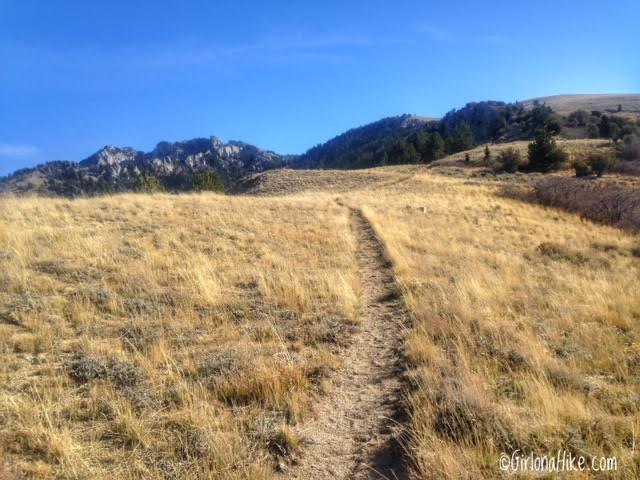
You can finally see where you are headed – the peaks to the left in the very far distance! Lone Peak is so close, yet so far away.
Midpoint Trail Junction
Eventually, you’ll spot your distant destination: Lone Peak and its jagged ridge.
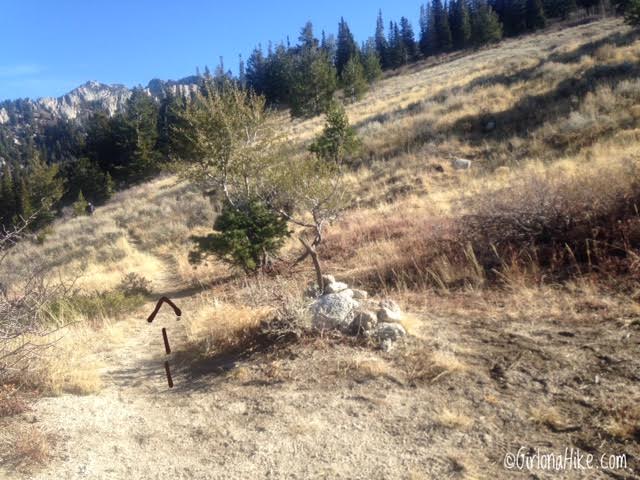
At 3.9 miles, an obvious trail split marked by a cairn and stick appears. Stay left. While you’re halfway in terms of distance, you still have about four more hours of hiking to go.
Entering Bear Canyon
The trail briefly descends into shaded Bear Canyon. Here, you’ll find one of the year-round springs—perfect for filtering water. After crossing, another set of roughly 10 switchbacks climbs back out.
You’ll intersect the Trail of the Eagle route again—stay on the main Cherry Logging Trail.
Looking back on a pretty meadow.
Arriving at Outlaw Cabin
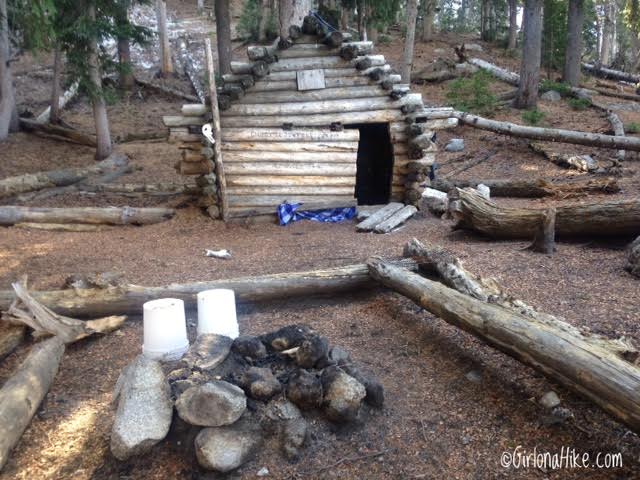
We reached Outlaw Cabin in 3 hours and 15 minutes. The Allen Brothers built it in 1960, before this area became designated wilderness.
The trail continues south of the cabin, ascending steeply through dense forest. In 15 minutes, you’ll reach another ridge.
The cabin itself is in rough shape—scattered beer cans, torn paper, and trash litter the inside. If you can, please carry out a piece of trash to help preserve this historic site.
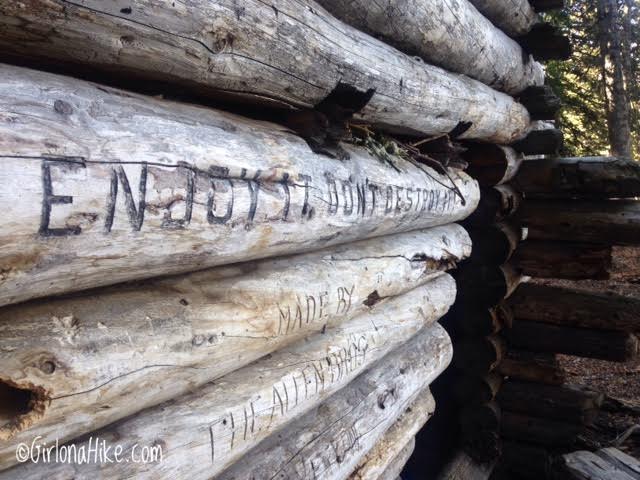
“Enjoy it, Don’t destroy it” is etched onto one of the logs, but quite frankly, the cabin was pretty run down. Tarps strewn about, beer cans lay all over the floor on the inside, paper shreds, and other trash lined the inside. I wish I would have had more room in my pack to take the trash down. If anyone heads up this year, please take at least one piece of trash down to the TH with you…this cabin needs some cleaning if it’s going to last.
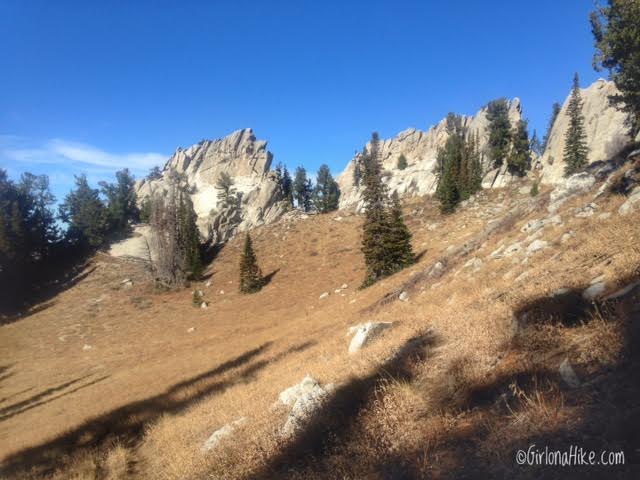
15 minutes or so past the Outlaw Cabin you will reach a small ridge, The trail continues left along the base of what looks like a fingered, granite ridge.
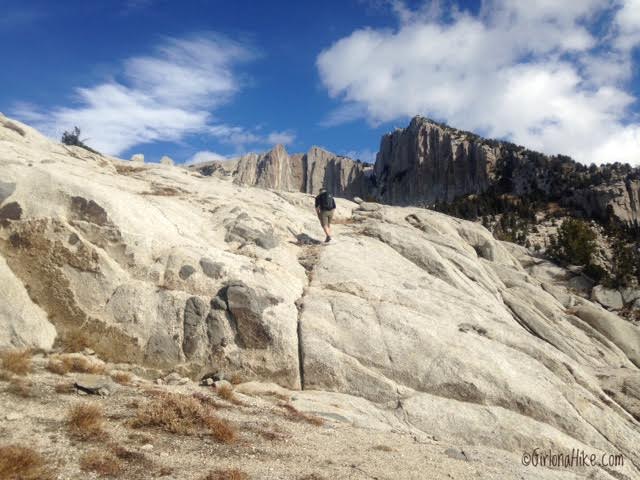
Granite Ridges and Cairn Trails
Fifteen minutes beyond the cabin, you’ll reach a granite ridge. The trail winds along its base, clearly marked with cairns.
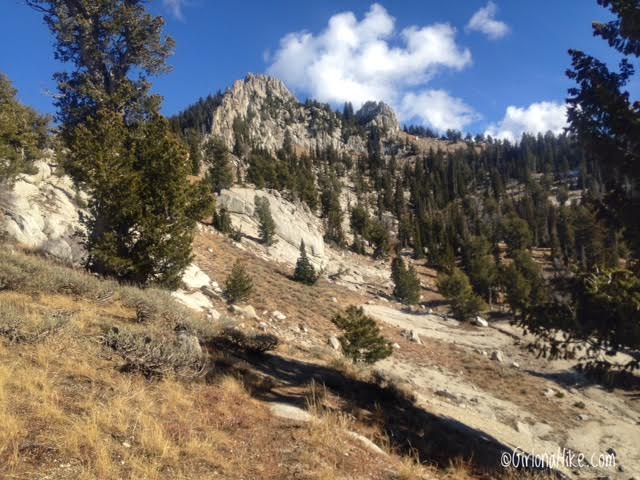
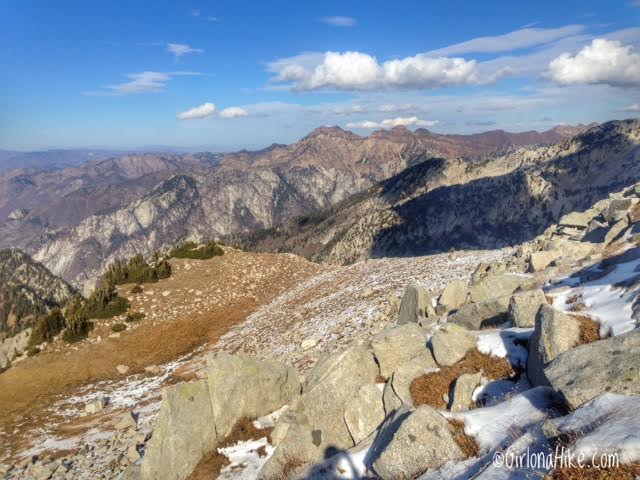
Continue upward toward the next ridge, with each step getting you closer to your goal. Eventually, you’ll gain a full view of Lone Peak to the left and Box Elder Peak and Mt. Timpanogos to the south.
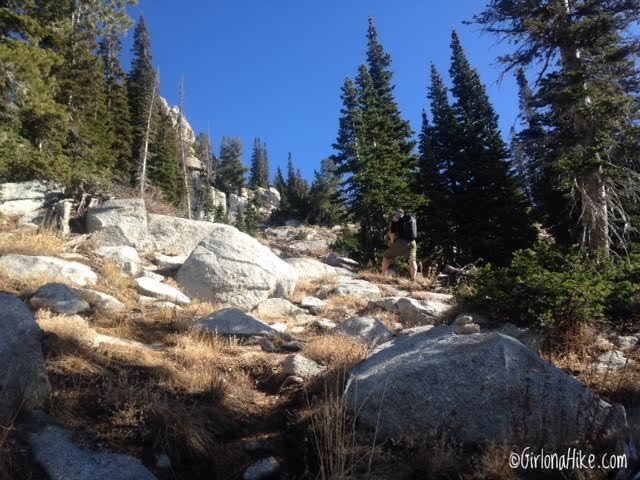
Working our way up to the next ridge…
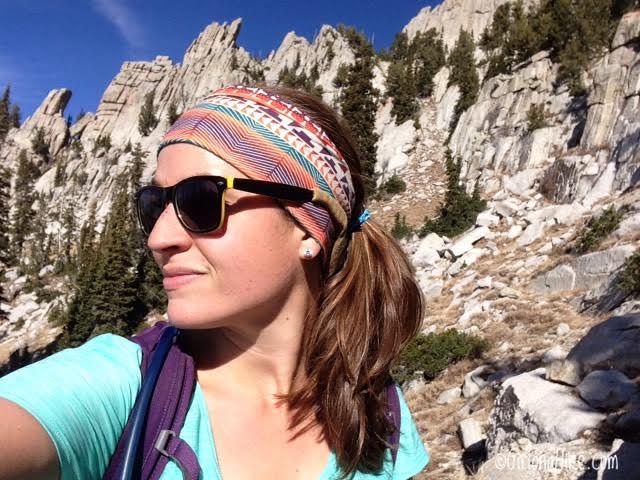
Selfie! 🙂
Can I tell you how much I freaking love BUFFS?! Kept the sweat and hair out of my face, but of course, I got a super sexy headband sunburn LOL.
Once you reach the small ridge, you will have your first full view of Lone Peak to the left, and Box Elder Peak & Mt. Timpanogos to the South. The trail stays left, following cairns.
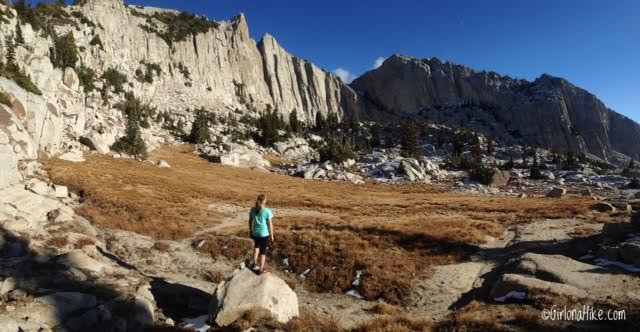
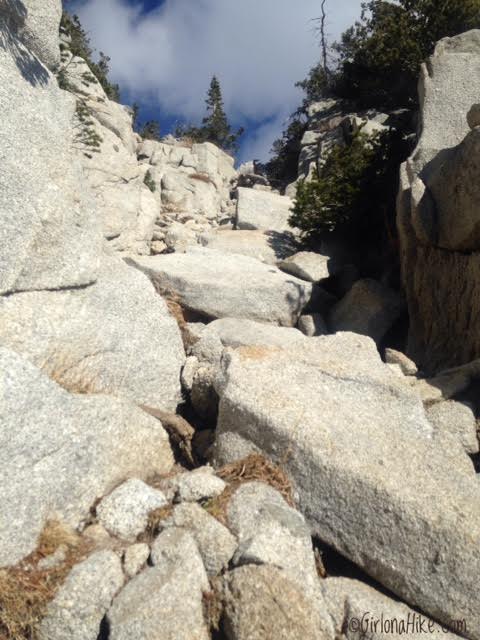
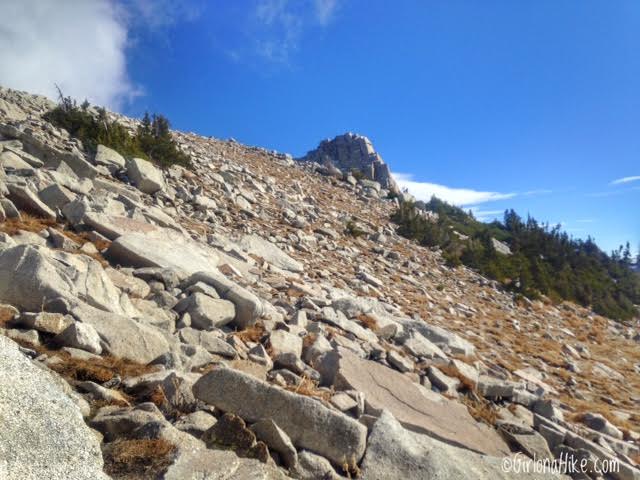
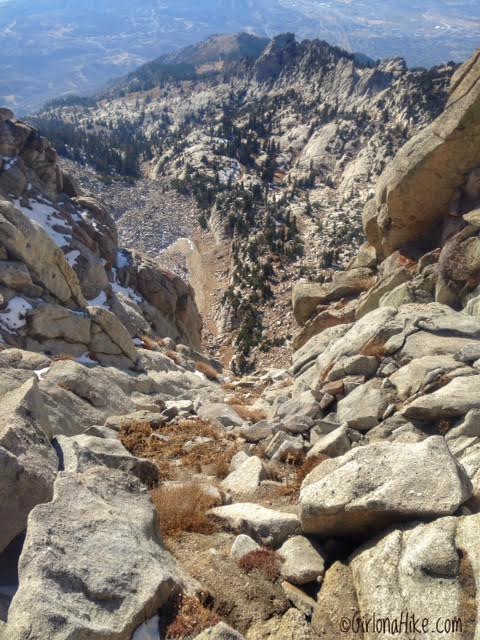
Boulder Fields and Final Push
The trail now leads into boulder fields—watch your footing carefully.
TIP: Don’t wear shoes that have the tread worn down. Shoes with full tread will help you grip the granite. We both wore our Altra Lone Peaks.
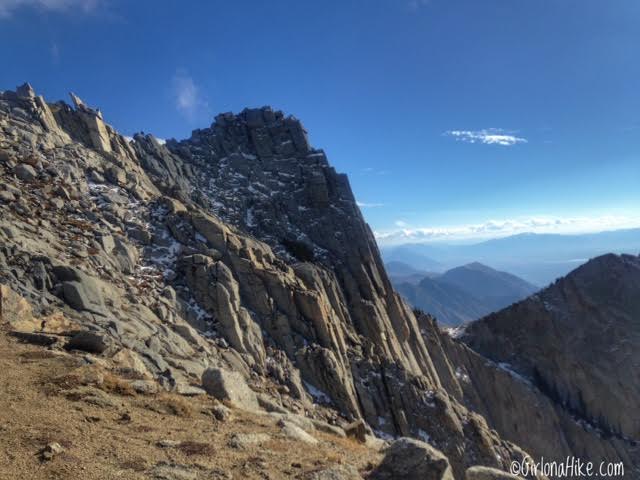
Base of Lone Peak
Continue following the cairns along the north ridge. Despite a little lingering snow, we didn’t need microspikes.
Following the cairns, it led us up a small drainage that was pretty easy to maneuver. We didn’t take the “chimney” drainage up that you hear of. This one was less steep of an incline.
Looking down into the basin we hiked through.
To reach the summit, the easiest way is to follow the North ridge. There was some remaining snow from a few weeks ago, but nothing so deep that we needed microspikes. You should clearly be able to see Broads Fork Twin Peaks.
Climbing the steep hill…so close to the summit!
Scrambling to the Summit
As the summit comes into view, this is a good time to drop your pack for a lighter, safer scramble. If you do decide to keep your pack on, make sure everything is zipped into a pocket. Sunglasses, snack bars, or anything on the outside of your pack can easily fall out. Don’t forget to put your camera in your pocket if you leave your pack behind.
I kept telling myself not to look down, but I couldn’t help it. I’m not afraid of heights, but this was a bit scary looking straight down. I was so amazed that we hiked up from the valley floor to here! Only a few feet to go…
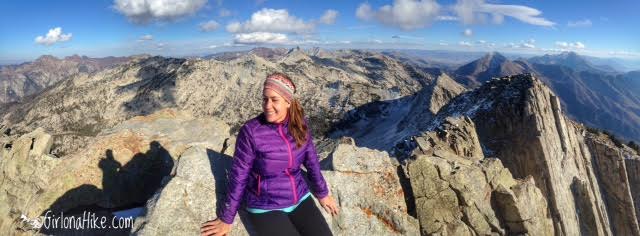
Summit Success!
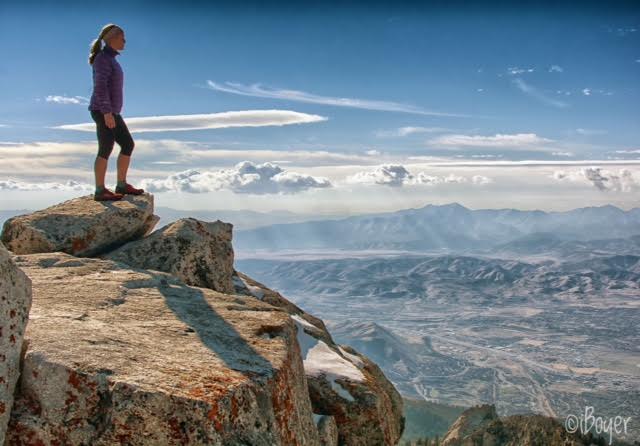
Made it to the top! Lone Peak offers panoramic views in every direction. The summit marker and jagged granite slabs mark your success. Photo by @iBoyer.
This is looking East. Lone Peak’s south summit is to the right.
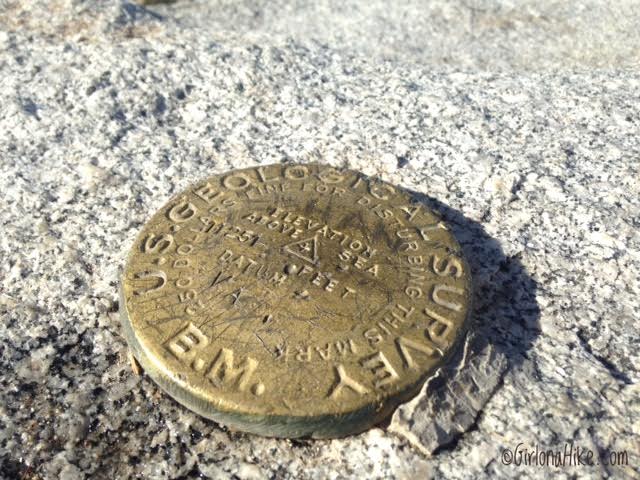
Official USGS summit marker! Woot woot!

Admiring the granite slabs.
Trail Stats at the Summit
At the halfway point, we had already logged 6 hours. Although tired and pressed for time, we could only stay 10 minutes at the summit before descending.
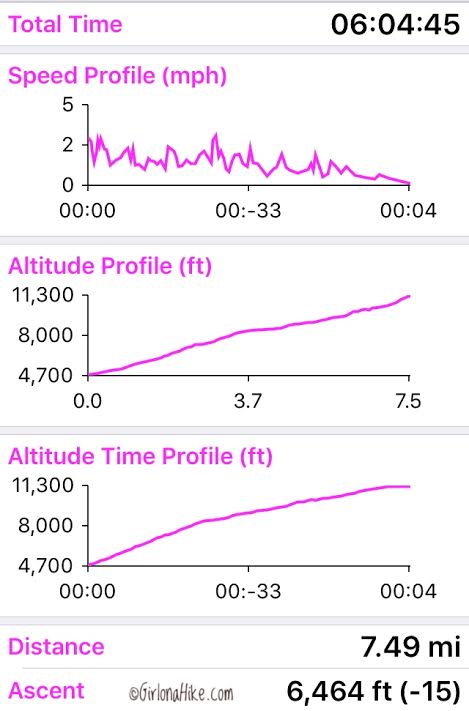
Trail stats half way through the hike, on the summit. It took just over 6 hours to summit. And to think….we were only halfway done. We still had to hike down the mountain. By this point I was so exhausted, and were running out of daylight, but you don’t have a choice – keep moving. We literally stayed on the peak for less than 10 minutes.
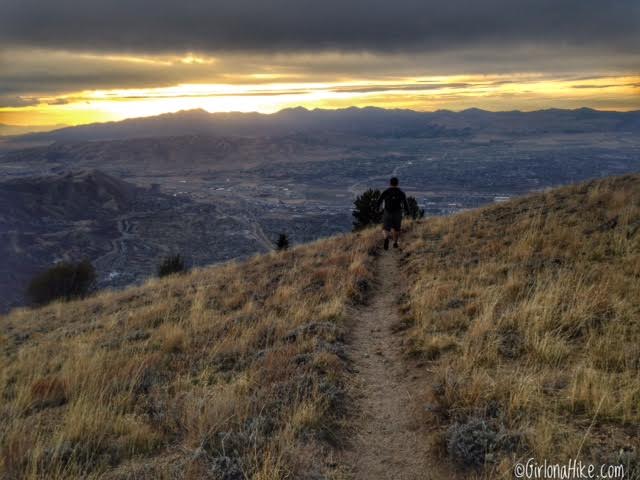
Hiking back down to the car during sunset.
Sunset Descent
Descending during golden hour provided epic views—and the bonus of watching a paraglider soar across the sky!
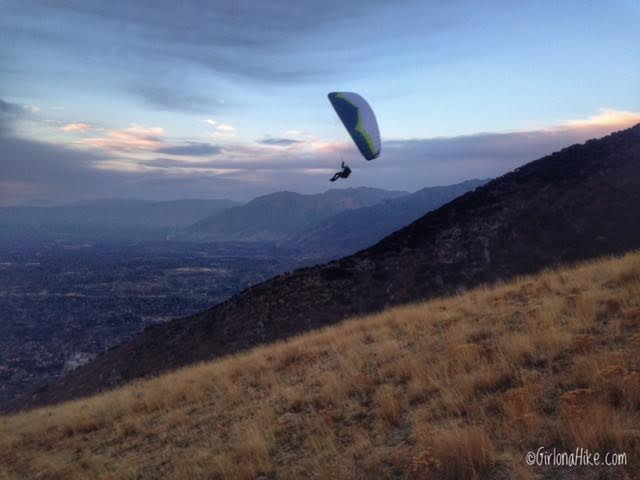
On the way down we got to see this guy flying his para-glider.
Total Trail Stats
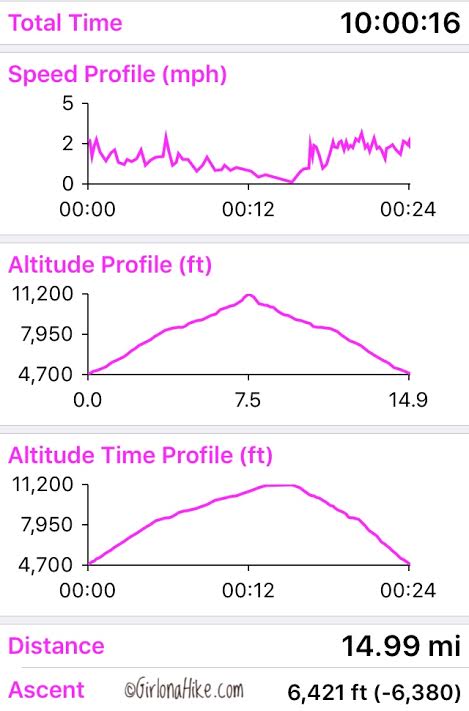
We got back to the car in exactly 10 HOURS! Wow. My legs were soooo done. 6 hours up, 4 hours down. Three days later as I write this, my calves are still extremely tight and sore. Definitely one of the toughest hikes and peaks I have done in a long time. I would say my other top two hardest peaks were Broads Fork Twin Peaks via Robinson’s Variation and Ibapah Peak.
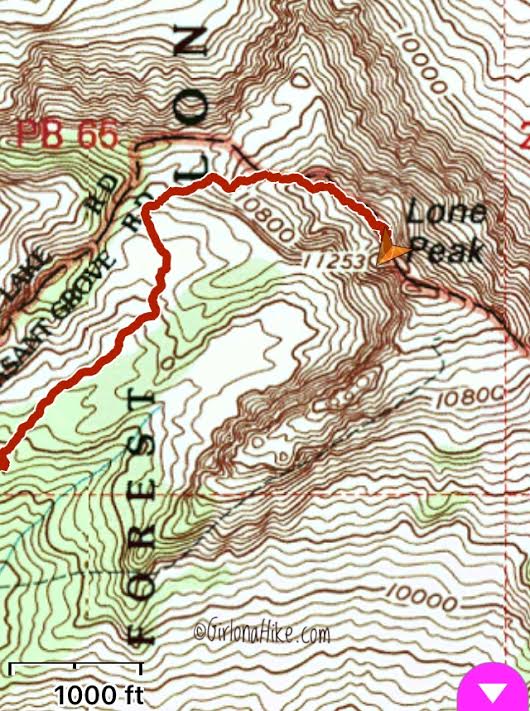
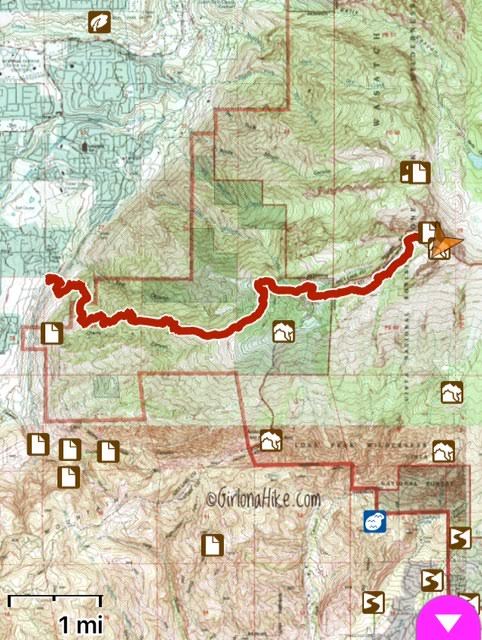
Trail Map
My track via Gaia GPS – the best tracking app! Get your app here for a discount.
Nearby Hike
Top 10 Peaks to bag in Salt Lake City, UT


Save me on Pinterest!