
Hiking Cobb Peak in the Silver Island Mountains: What to Know Before You Go
Cobb Peak (7,021 ft), located in the Silver Island Mountains of Utah, is one of the toughest and most rugged peaks I’ve attempted—and honestly, not one I’d rush to do again. If you’re planning on hiking Cobb Peak, here’s what you need to know to prepare for a steep, exposed, and route-finding-heavy adventure.
Why Cobb Peak Is a Challenging Hike
Let’s be upfront: Cobb Peak isn’t a beginner-friendly hike. There’s no official trail, limited shade, no water sources, and the terrain is extremely steep and rocky. While I’ve tackled plenty of off-trail peaks before, this one stood out as especially difficult.
Though the route to the summit is only 1.7 miles one way, it felt much longer due to constant route finding and intense bushwhacking. Sections of the ascent include scrambling up rock slabs and navigating loose scree—some parts were so sketchy I wouldn’t recommend doing this hike solo.
Vehicle Access: High Clearance Required
Another major consideration is getting to the trailhead. To access Cobb Peak, you must have a high-clearance 4×4 vehicle. The Silver Island Mountains are notorious for rough, rocky roads, and flat tires are extremely common.
My group came prepared with a spare tire and the right tools, but I wouldn’t recommend attempting this drive without backup gear and off-road driving experience.
Directions
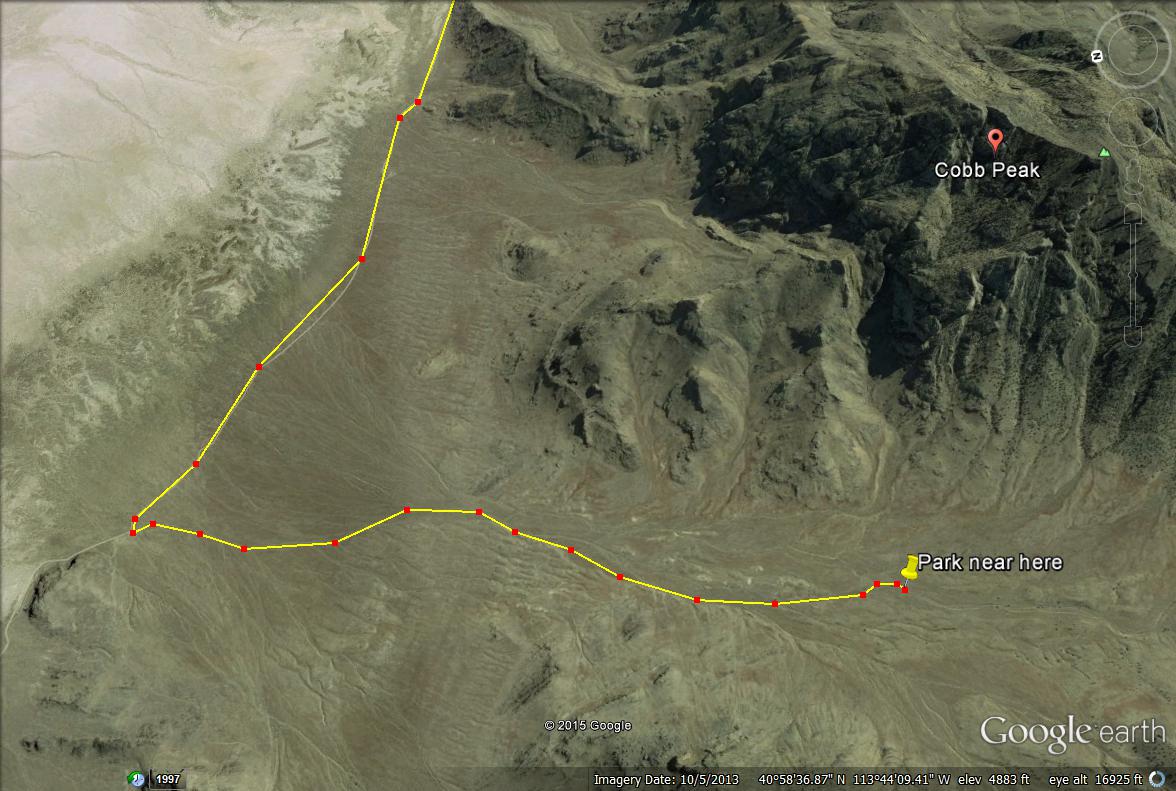
From SLC head west on I-80 towards Wendover. Just after the “Tree of Life” sculpture, turn right onto a dirt road. Follow this towards Floating Island, and wrap around the East side, then around the North. The road will turn West, towards the peak. Once you get to the base of the mountain, you will come to a “T”, and you’ll want to turn Right. Again, wrap around the mountain to the East, then drive along the north side. Just before a knoll, look for a road heading Left. Follow this for about 20 minutes (you will be driving slow), and look for a good place to park and to begin hiking. We parked around 4700 ft, by two Juniper trees. Plan on a 3 hour drive from SLC.
Trail Map
Distance: 3.5 miles round trip
Elevation gain: roughly 2,400 ft
Time: 6-8 hours
Dog friendly? Yes, but only for dogs who are use to hiking in this terrain. Otherwise their paws will get torn up.
Kid friendly? No.
Hiking Cobb Peak: What to Expect
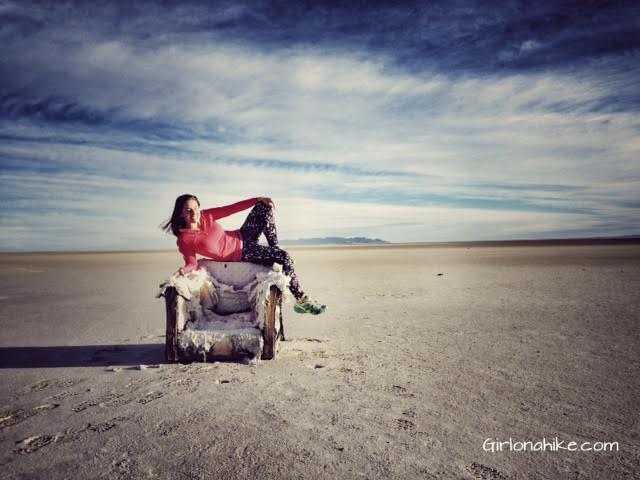
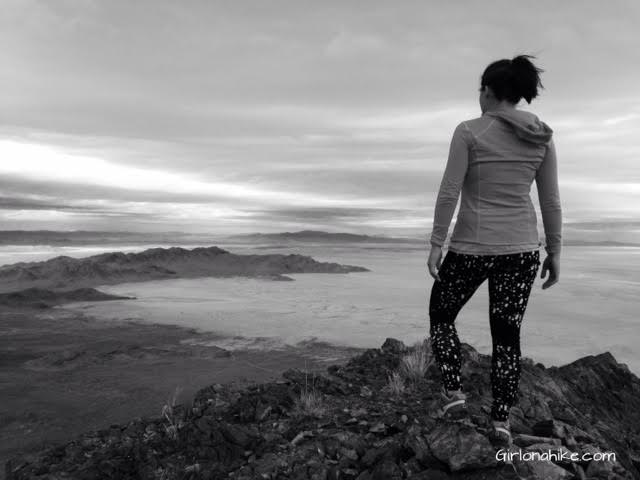
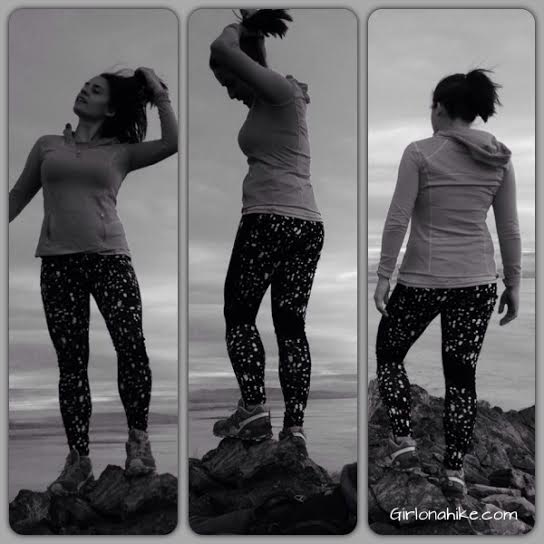
Let’s start from the beginning, on our drive there. As soon as you turn off I-80, past the “Tree of Life” sculpture and onto the dirt road, you’ll have amazing views of the Salt Flats. You may see this old chair someone has put out there, that is a popular spot for models to take photos. We thought it would be fun to do our own “modeling” but in our hiking clothes.
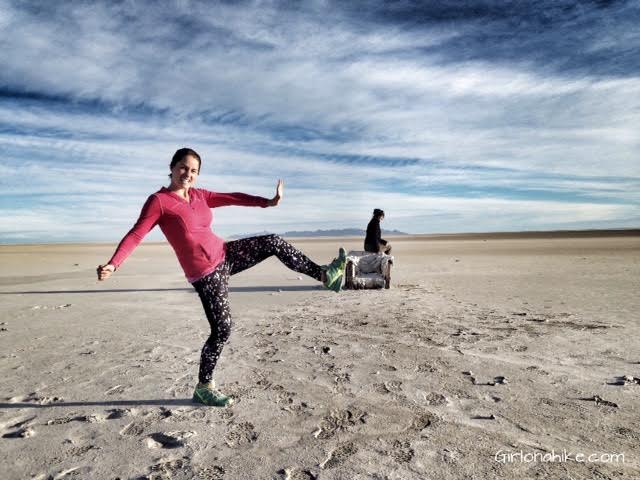
Having fun with dimensions and sizes.
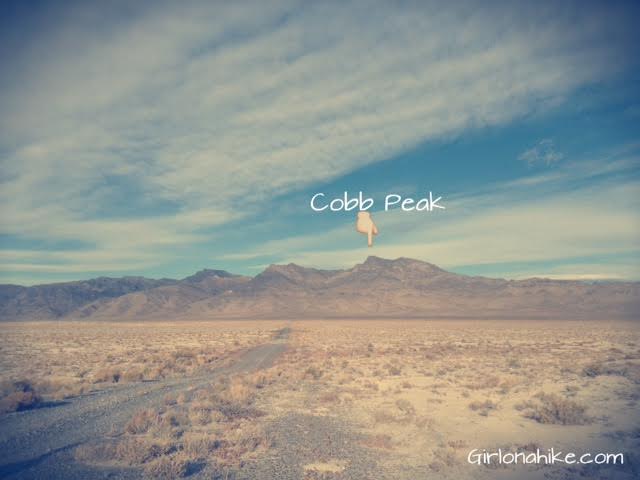
After you drive around Floating Island, you’ll have a great view of Cobb Peak ahead of you.
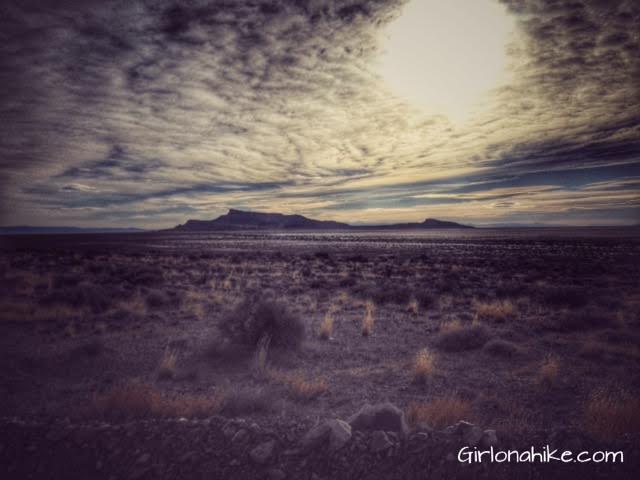
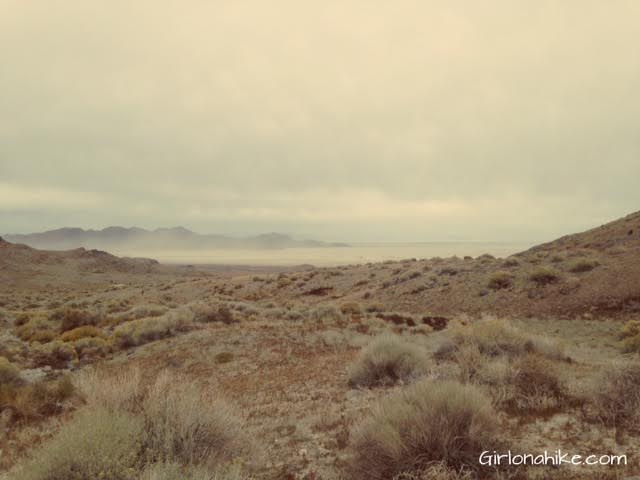
After we turned off the road at the “T”, we looked back and saw Floating Island from a distance. The haze and clouds make for an interesting photo.
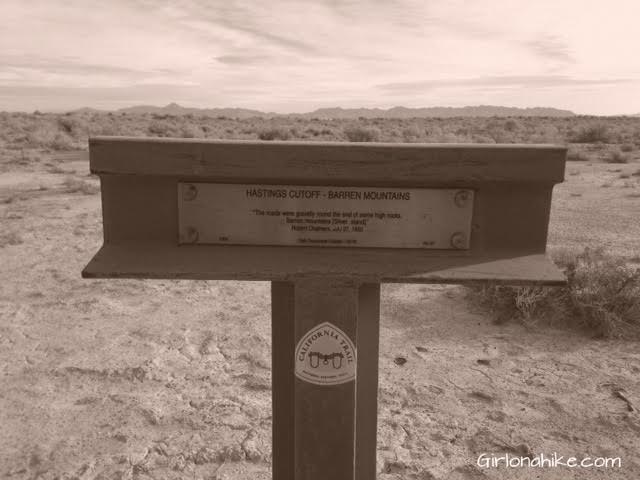
Along the way you’ll see these brown signs for the California Trail. For information on the Hastings Cutoff and California Trail, click here.
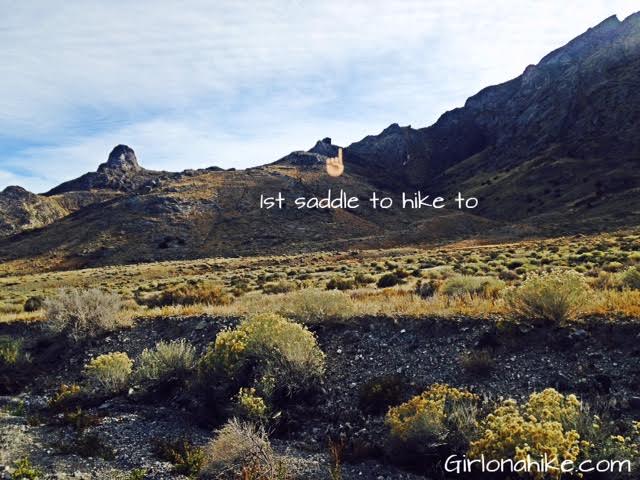
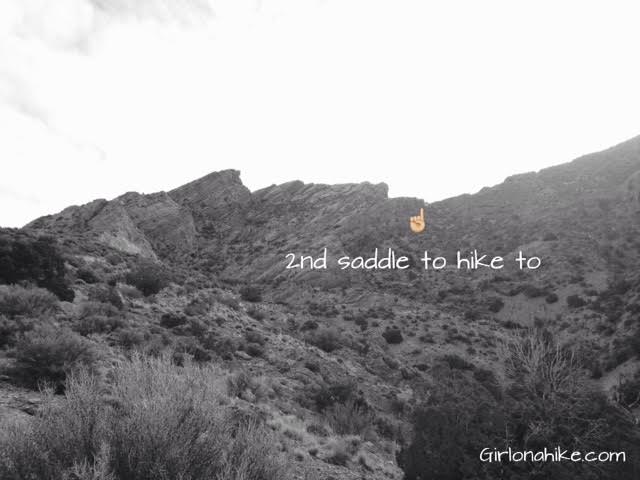
After you drive around the mountain from the East, then along the north side, and just before a knoll, look for the road heading south. Drive up this until you reach this area, and can find a good spot to park. Again, there is no official parking area or trail head signs. Just pick a spot and start hiking. From this view, you see the Thumb Butte on the left, which is actually about 150-200 ft tall on all sides. You’ll want to aim for where this hand is pointing, to get to the first saddle. Getting to this saddle should only take about 45 minutes to 1 hour.
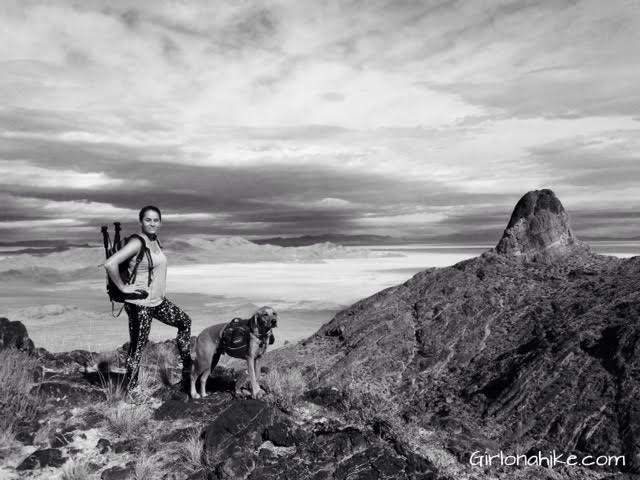
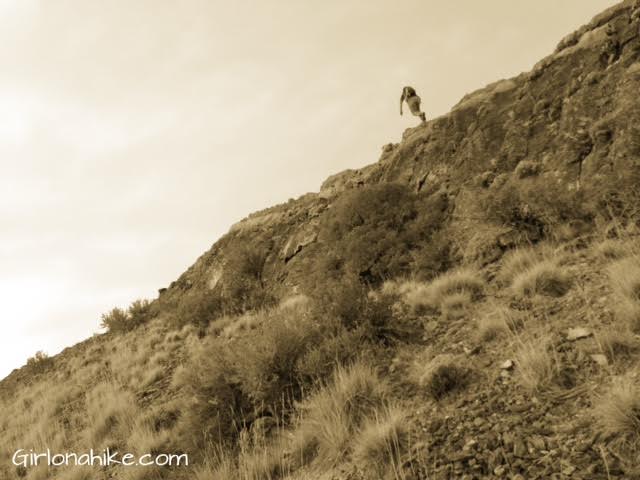
Here we are getting closer to the 1st saddle, with a better view of the Thumb Butte.
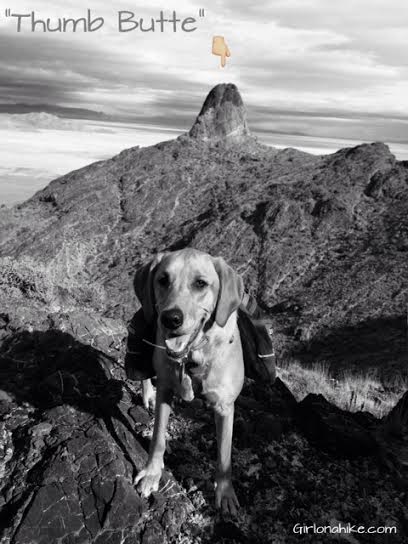
Charlie told me he wanted to pose in front of the Thumb Butte too!
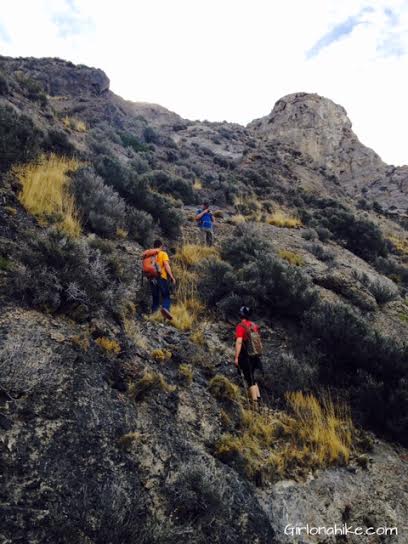
This photo depicts what the rest of the route will be like – lots of steep, loose rock, with bush whacking required. The butte in the top right corner of this photo is a false summit.
As we got up higher, we were able to take some great photos of the landscape.
We reached a ledge, and could see the rest of our route. We worked up from here, then over just under that large rock, then up again towards the 2nd saddle. If you look at the route/maps below, you will have a better idea of how we got to this ledge.
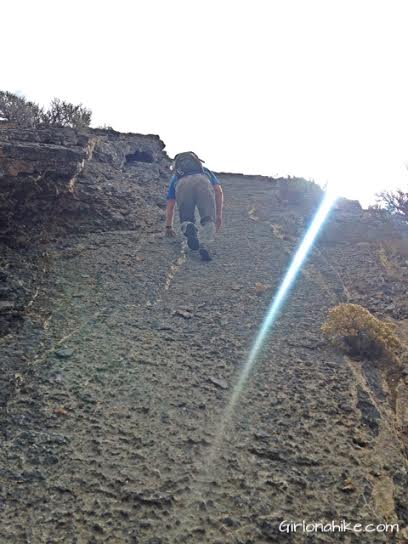
This is the 30 ft rock slab I mentioned in the beginning. This rock is actually VERY grippy, but with the length you have to climb and the elevation you are at, for me, was quite nerve-wrecking. CJ and Charlie were able to climb up with no problem, but I felt more comfortable hanging onto the left-hand ridge and rocks. Be careful where you grab onto – a lot of rock falls right off with hardly any weight on it. Always do a little weight test before pulling yourself up.

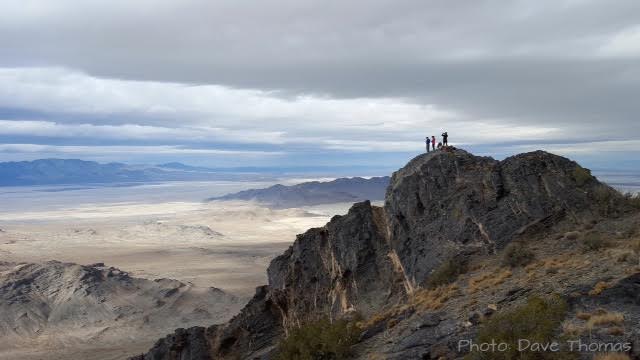
On the ridge, we had a great view of Floating Island.
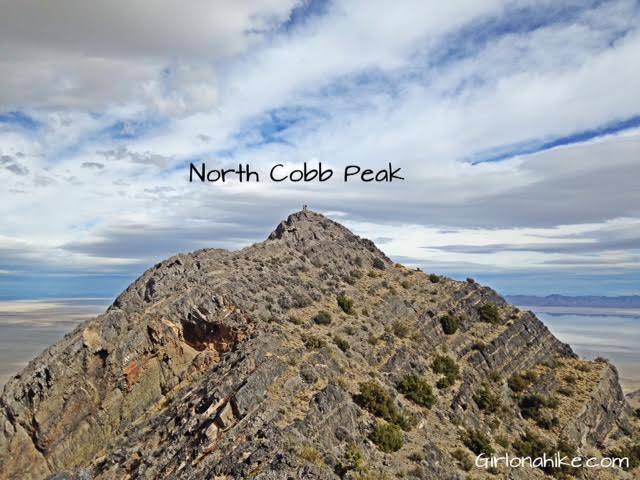
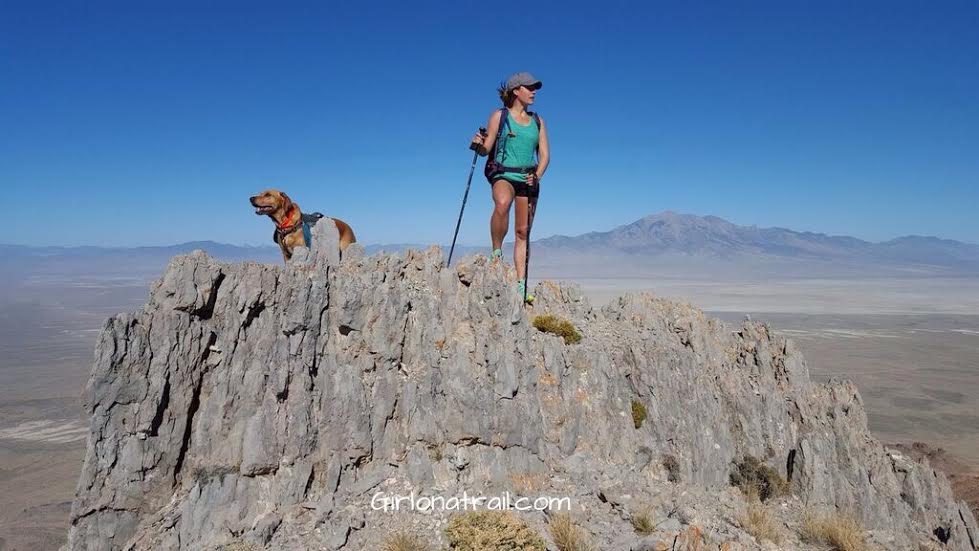
When you are on the ridge, you can head left (North East) and summit what I am calling North Cobb Peak. You can see two stick figures on the peak – the boys were able to make it up. To get to Cobb Peak, head right once you reach the ridge.
3 hours later….so close to the peak!
Dave caught me in the act of fixing my hair! It was pretty windy at the top.

On the summit we left a red notebook for hikers to check in and leave a note, in a ziplock bag. If you make it to the peak, look for my name! The summit provides amazing views of the Silver Island Mountains to the West, and Crater Island Mountains to the North (pictured here).
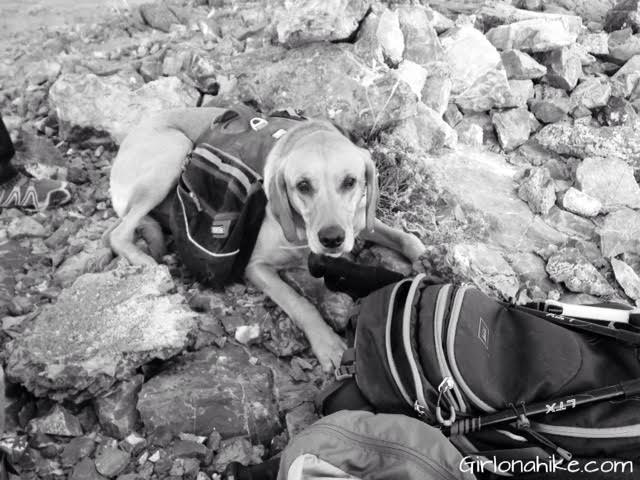
Charlie was pretty tired at the summit! He did such a good job on this hike. If you decided to bring your dog, again, make sure they have experience hiking in this terrain. The rock will tear up their paws very easily, if they aren’t broken in with other hikes. After we do big, rough hikes like this, I always apply Musher’s Secret on his paws.
Musher’s Secret is an all-natural, wax-based cream, which protects paws from harsh surfaces. When applied to pads and between toes, it dries in seconds to form a shield. It can be used as needed to prevent abrasions, burning, drying, & cracking. I apply this to Charlie a lot during winter as well, to protect against ice burn.
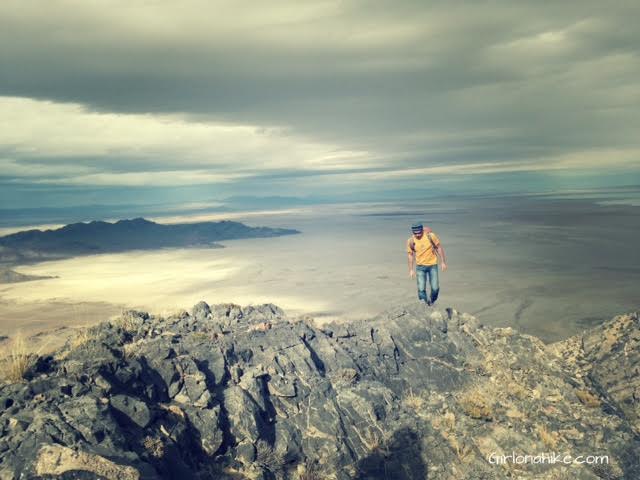
Dave walks along the summit ridge.
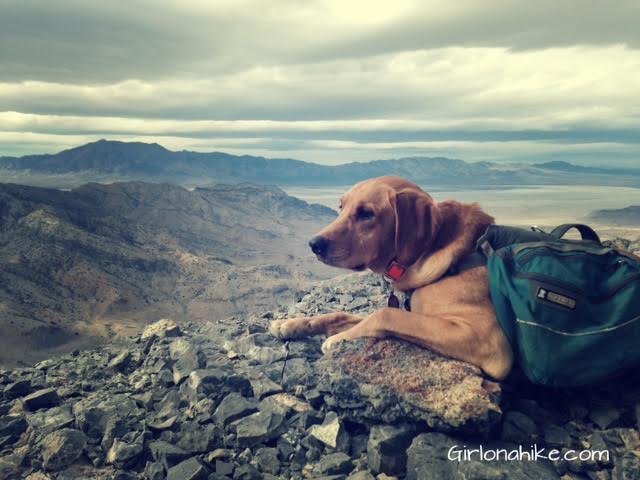
Charlie takes a break and takes in his surroundings. Pilot Peak is visible from Cobb Peak, and is the tallest peak in the left corner in this phot.
We worked out way down basically the same way we came up, but avoided the rock slab. You’ll want to go the same way, otherwise you’ll be cliffed out.
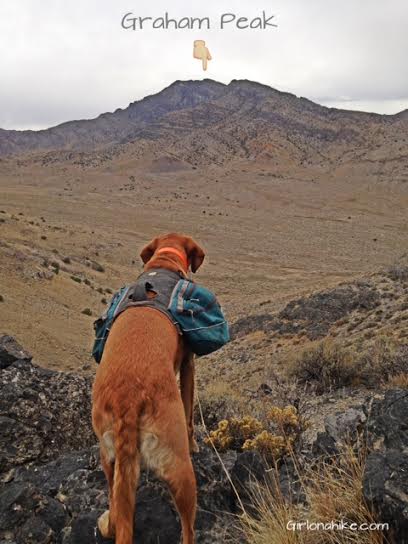
Most of the hike you can see Graham Peak, which is another top “peak bagger” summit to check off. Graham Peak is only about 550 ft taller than Cobb Peak. Graham Peak has more than 3000 ft of prominence which ranks it #37 on the Utah Prominence List, so it is considered the “cooler” peak to summit.
As we continued working downhill, a storm blew in and kicked up a lot of dirt and sand, and eventually began raining. Be prepared for all kinds of weather in this part of Utah – you never know what could happen!
Once we got back to the car, we chowed down on sandwiches, chips, cookies, and an ice cold beer.
Here is the driving map below. This will help guide you to how to get to the start of your hike.
Final Thoughts on Hiking Cobb Peak
If you’re looking for a remote, challenging, and technical route in Utah’s west desert, hiking Cobb Peak in the Silver Island Mountains will definitely test your limits. It’s a route best suited for experienced hikers with strong navigation skills, a solid hiking partner, and a reliable off-road vehicle.
Would I hike it again? Probably not. But if you go in knowing what you’re up against, it could be a rewarding accomplishment for the right adventurer.
Maps

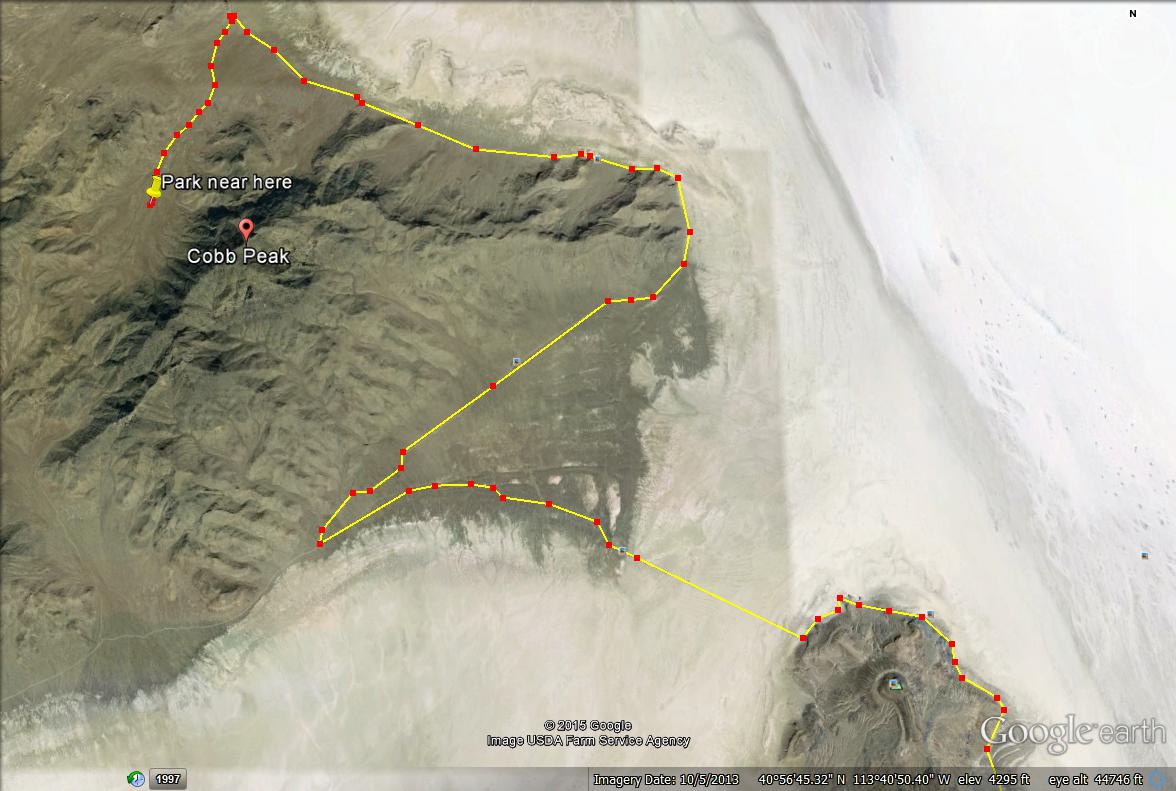
A few more driving routes/maps.
Park near here.
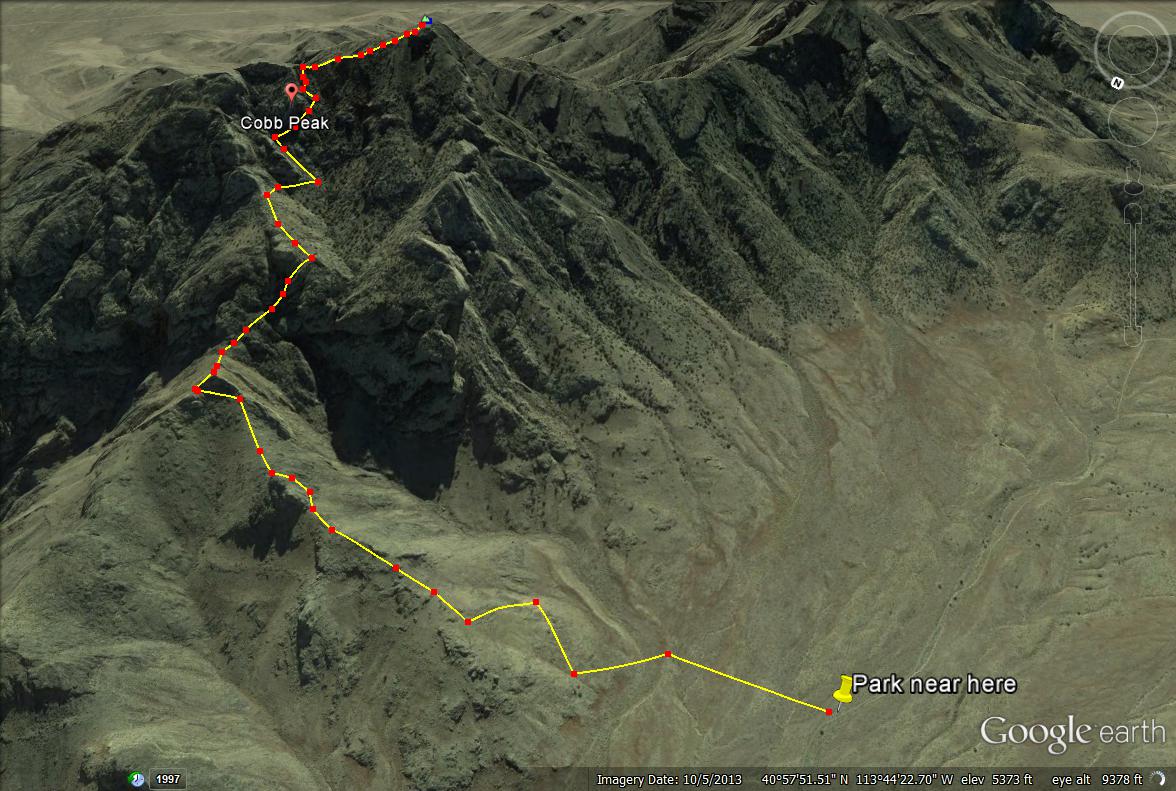
The actual route we hiked up to the peak.
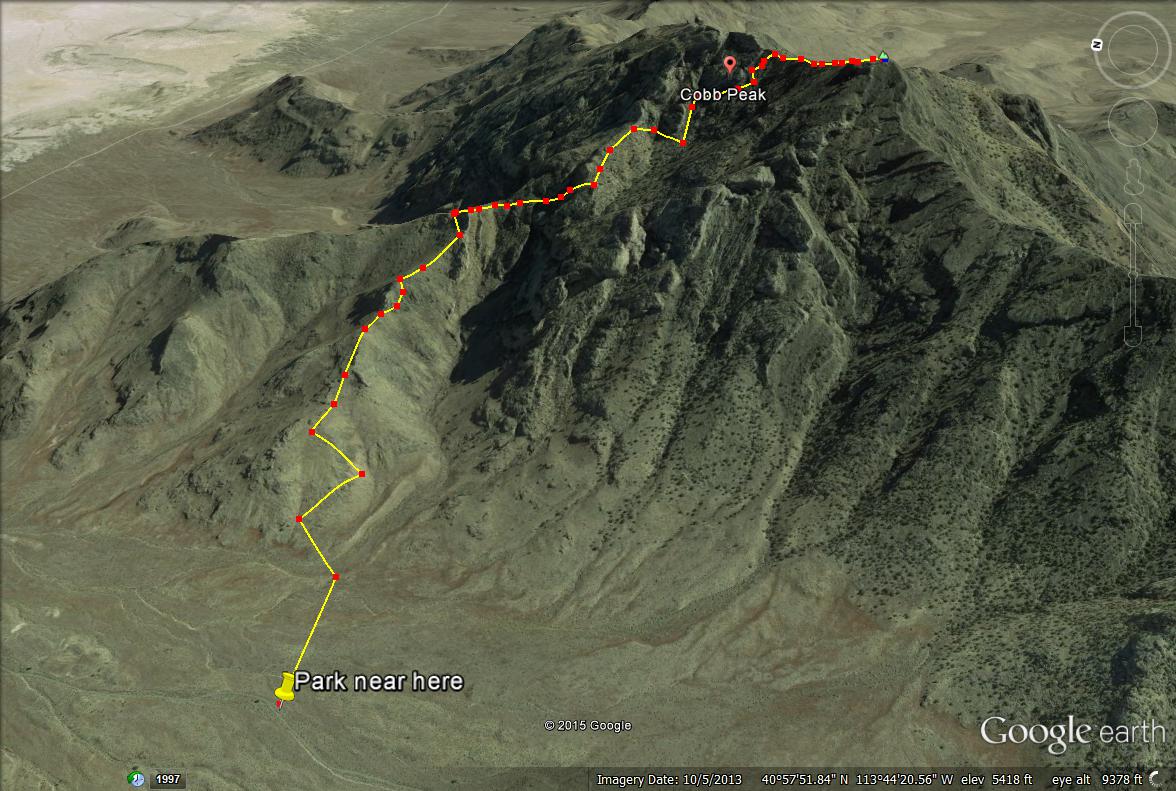
Another view of the actual route we took.